Installing an Elementor Template Kit purchased from Themeforest allows you to create professional, visually appealing websites with ease. Below is a comprehensive guide to help you integrate and customize Elementor Template Kits effectively.
Before You Begin: Understand the Basics
Before starting, ensure that you have an Elementor Template Kit from Themeforest. Here’s what you need to know:
- What are Elementor Template Kits?
These kits are designed for the Elementor Page Builder plugin for WordPress and are optimized for easy import and customization. They are labeled as “Elementor Template Kit” in the item title and filename. - What can’t be installed using the Envato plugin?
The plugin only supports Elementor Template Kits. It cannot install:- WordPress themes
- HTML templates
- Site templates
- UI/UX templates
- Requirements:
- Ensure your WordPress site has the Elementor plugin installed.
- Some kits may require Elementor Pro. Verify plugin requirements on the product page.
Step 1: Download the Elementor Template Kit
- Log in to your Themeforest account and navigate to your downloads.
- Locate the template kit you purchased and download the ZIP file.
- Important: Do not unzip the file. If you’re using Safari, disable the “Open Safe Files after Downloading” option in Preferences to keep the file zipped.
Step 2: Install the Envato Elements Plugin
The Envato Elements plugin is essential for importing and managing your Template Kit. Here’s how to set it up:
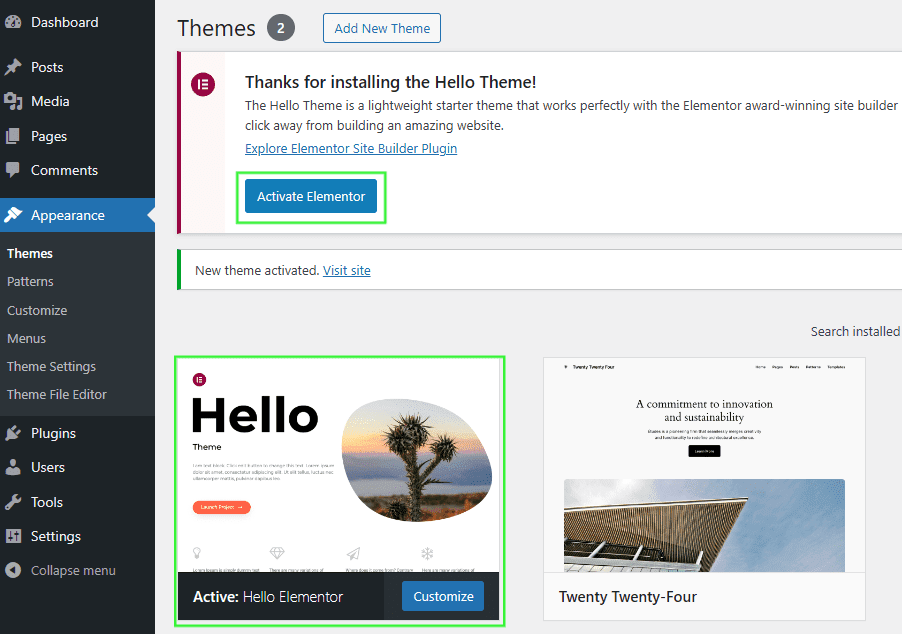
- Activate the Required Theme
- Navigate to Appearance > Themes in your WordPress dashboard.
- Install and activate the Hello Elementor theme for optimal compatibility.
- If prompted, install and activate the Elementor Page Builder plugin.
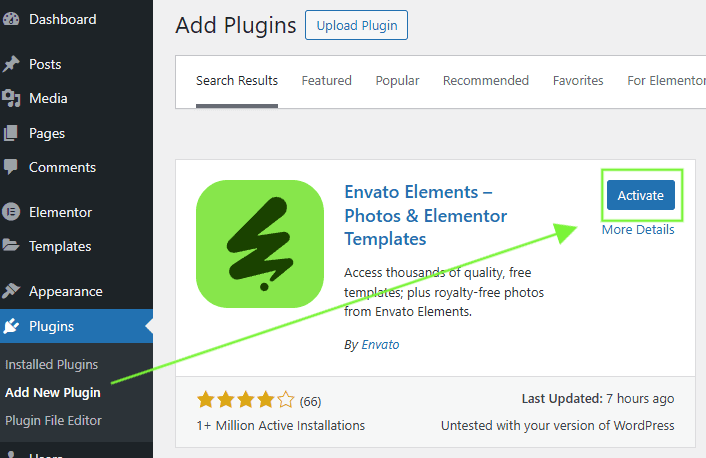
- Install the Plugin
- Go to Plugins > Add New and search for “Envato Elements – Photos & Elementor Templates.”
- Click Install and then Activate.
- Adjust WordPress Settings
- Go to Settings > Permalinks and select “Post Name.” Save your changes.
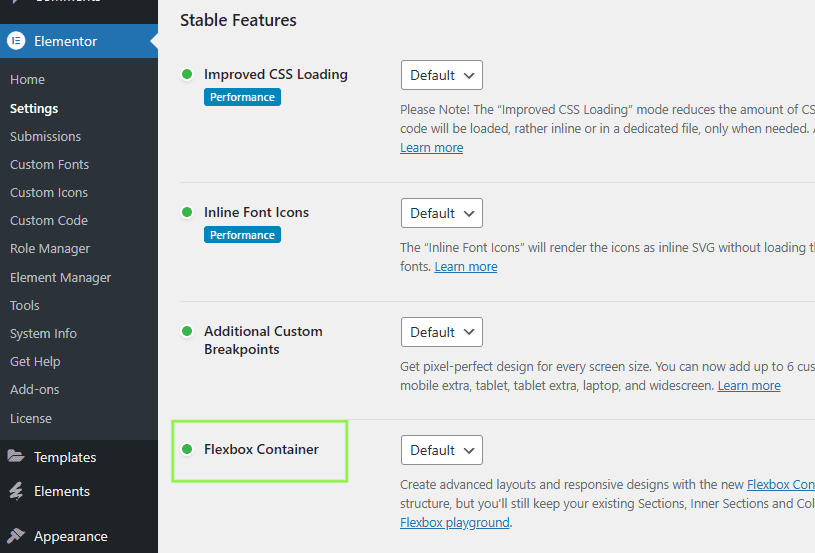
- Navigate to Elementor > Settings, click the Features tab, and activate the Flexbox Container feature (required for kits published after October 2023).
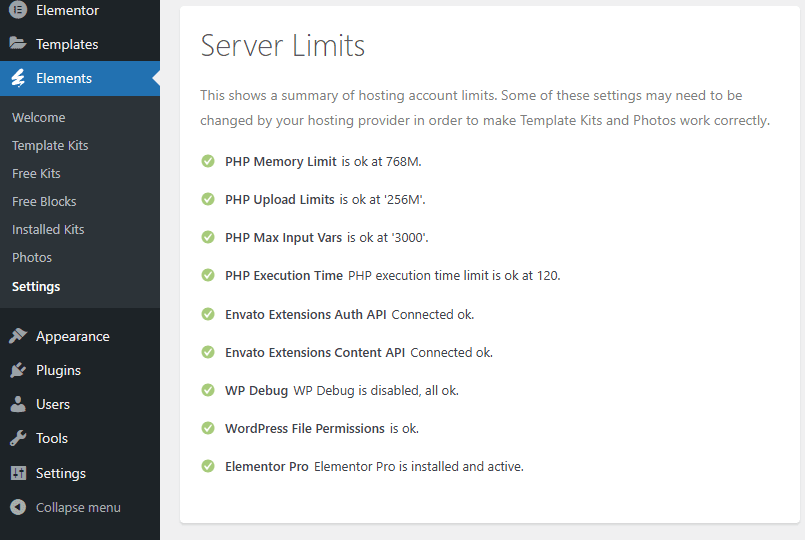
- Check Server Limits
- Visit Elements > Settings to ensure all server limits are marked with green checks.
- If any limits are not met, contact your web host for assistance.
Step 3: Import the Template Kit
Now that the Envato Elements plugin is installed, you can upload and import your Template Kit:
- Upload the Kit
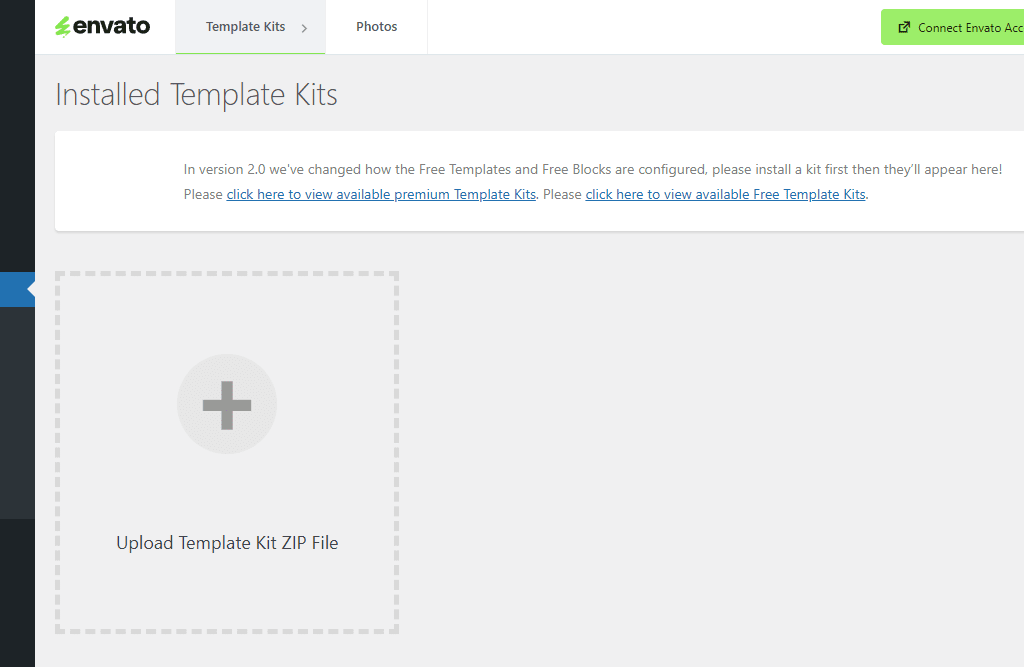
- Go to Elements > Installed Kits and click Upload Template Kit ZIP File.
- Select the ZIP file you downloaded earlier.
- Install Requirements
- After uploading, an orange banner may appear at the top of your screen. Click Install Requirements to load the necessary addons and settings.
- Import Templates
- Start by importing the Global Kit Styles to set the overall design (e.g., fonts, colors, and site settings).
- Import individual templates (e.g., headers, footers, and page layouts) one at a time, following the order provided in the kit.

Troubleshooting Common Errors
- Invalid ZIP File: Ensure the file is not unzipped and is an Elementor Template Kit.
- PHP Zip Extension Error: This indicates a missing server extension. Contact your web host to enable the PHP Zip module.
- Import Issues: Unoptimized hosting environments may cause errors. Upgrade your hosting or follow troubleshooting guides provided in the kit’s documentation.
Step 4: Customize Your Site
Once imported, the templates need to be customized to match your branding and content.
- Insert Templates into Pages
- Go to Pages > Add New and give your page a title.
- Click Edit with Elementor to launch the Elementor editor.
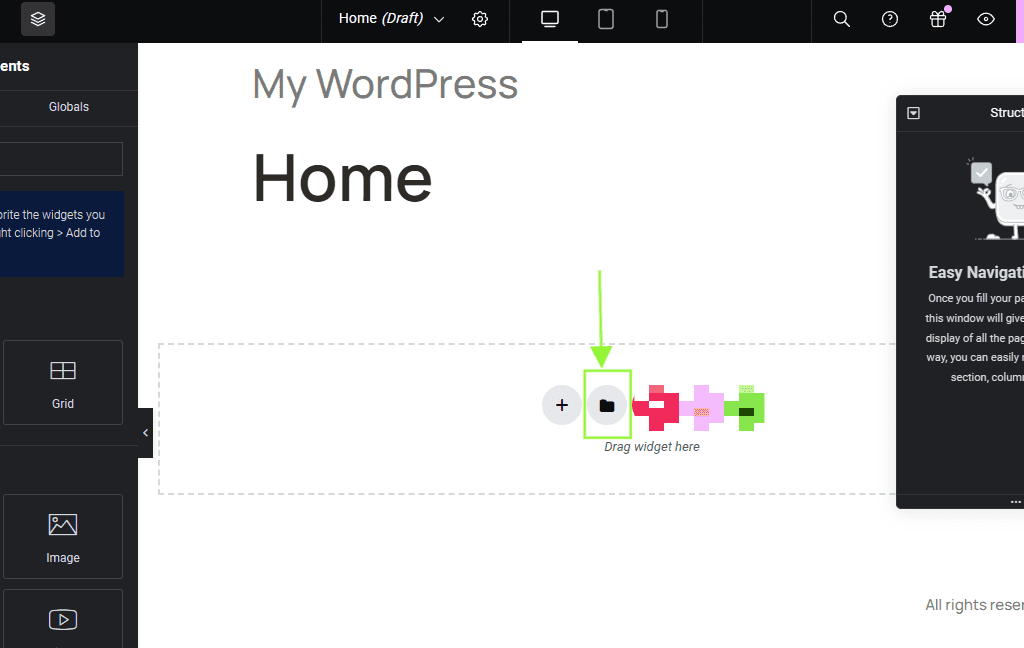
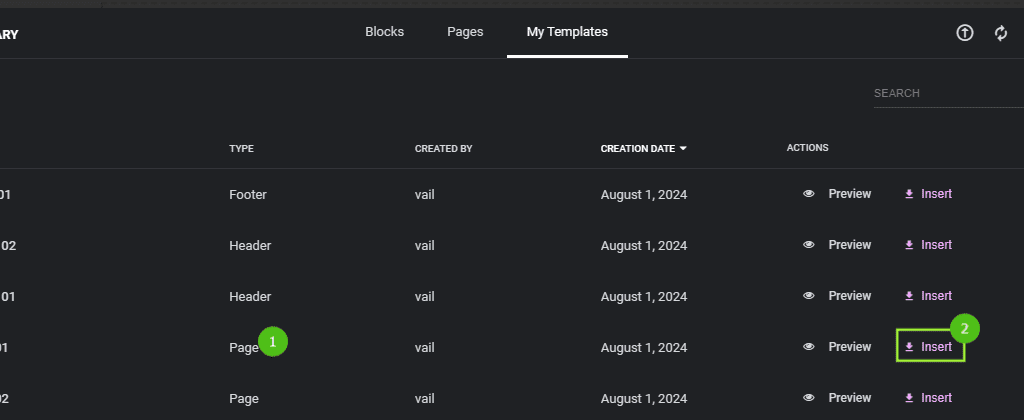
- Use the folder icon to access the Elementor Template Library and select the desired template.
- Page Layout Settings
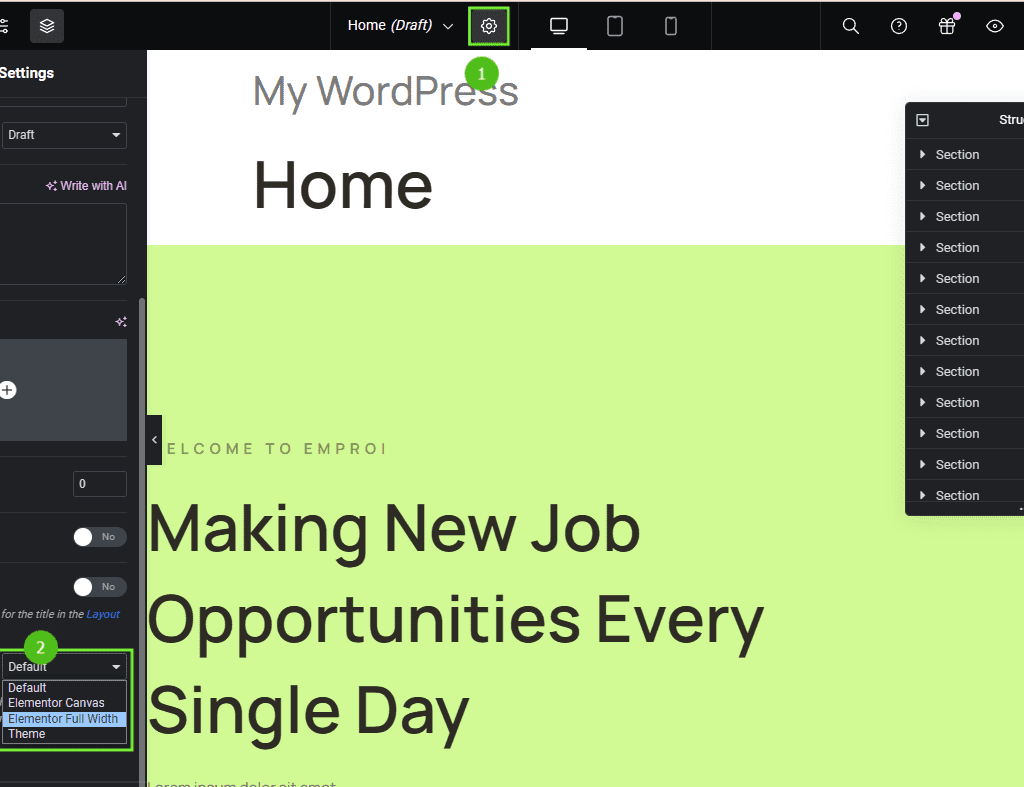
- Open the Page Settings (gear icon in the Elementor editor).
- Select Elementor Full Width or Elementor Canvas as the page layout, depending on the design requirements.
- Customize Widgets and Blocks
- Modify forms, tabs, slides, and other widgets by selecting the appropriate block in the widget settings.
Step 5: Set Up Global Headers and Footers
- For Elementor Pro Kits:
- Headers and footers are automatically imported under Templates > Theme Builder.
- Verify that the header condition is set to “Entire Site.”
- For Non-Pro Kits:
- Follow the documentation provided with your Template Kit to set up headers and footers manually.
- Navigation Menu:
- Go to Appearance > Menus to create and manage your site’s navigation menu.
Step 6: Set the Homepage
- Navigate to Settings > Reading.
- Select “Static Front Page” and choose the page you want as your homepage.
Additional Tips for Success
- Forms and Loops:
- Some kits come with advanced content blocks. Refer to the kit’s documentation for setup instructions.
- Regular Updates:
- Keep your WordPress installation, Elementor plugin, and Envato Elements plugin updated for optimal performance.
- Resources and Support:
- Check the Template Kit’s item page for detailed guides, FAQs, and support resources.
By following this detailed guide, you’ll be able to seamlessly upload, install, and customize Elementor Template Kits from Themeforest, creating a stunning WordPress site tailored to your needs.
